Python3.11二进制AI项目程序打包为苹果Mac App(DMG)-应用程序pyinstaller制作流程(AppleSilicon)

众所周知,苹果MacOs系统虽然贵为Unix内核系统,但由于系统不支持N卡,所以如果想在本地跑AI项目,还需要对相关的AI模块进行定制化操作,本次我们演示一下如何将基于Python3.11的AI项目程序打包为MacOS可以直接运行的DMG安装包,可以苹果系统中一键运行AI项目。
MacOs本地部署AI项目
首先确保本地已经安装好 arm 内核的Python3.11程序,可以在Python官网进行下载和安装:python.org
这里以快手团队著名的表情迁移项目 LivePortrait 为例子,首先克隆快手团队官方的项目:
git clone https://github.com/KwaiVGI/LivePortrait.git 进入项目的目录:
cd LivePortrait 安装基于Mac系统的相关依赖:
# for macOS with Apple Silicon users
pip install -r requirements_macOS.txt
随后修改app.py文件,在代码上方加入环境变量的设置:
# coding: utf-8

"""
The entrance of the gradio for human
"""

import os
os.environ["PYTORCH_ENABLE_MPS_FALLBACK"] = "1"
PYTORCH_ENABLE_MPS_FALLBACK=1 这个环境变量用于 PyTorch 中的 MPS(Metal Performance Shaders)加速功能。
MPS 是苹果公司为 macOS 和 iOS 设备提供的图形处理单元 (GPU) 框架,可以加速机器学习模型的训练和推理。
PYTORCH_ENABLE_MPS_FALLBACK=1 表示启用 MPS 回退功能。当 PyTorch 检测到设备支持 MPS 时,它会优先使用 MPS 进行加速。如果 MPS 无法使用,它会回退到 CPU 上运行。
简而言之,设置这个环境变量可以帮助 PyTorch 在支持 MPS 的设备上利用 GPU 加速,并在不支持 MPS 的设备上正常运行。
如果不单独设置这个变量,启用推理的时候会报错。
随后,启动推理页面进行测试:
python3 app.py 注意,由于xpose暂不支持mps推理,所以mac版本不支持动物表情驱动,只支持人物的表情驱动。
如果推理没有问题,那么可以开始进行打包操作了。
MacOs本地打包AI项目
首先,安装pyinstaller库:
pip3 install -U pyinstaller 随后,创建 app.spec 项目配置文件:
# -*- mode: python ; coding: utf-8 -*-
import sys
sys.setrecursionlimit(5000)
from PyInstaller.utils.hooks import collect_data_files

datas = []
datas += collect_data_files('gradio_client')
datas += collect_data_files('gradio')


a = Analysis(
    ['app.py',


    ],
    pathex=['/Users/liuyue/Downloads/LivePortrait_For_Mac'],
    binaries=[],
    datas=datas,
    hiddenimports=[],
    hookspath=[],
    hooksconfig={},
    runtime_hooks=[],
    excludes=[],
    noarchive=False,
    optimize=0,
    module_collection_mode={ 'gradio': 'py'}
)
pyz = PYZ(a.pure)

exe = EXE(
    pyz,
    a.scripts,
    [],
    exclude_binaries=True,
    name='LivePortrait',
    icon='AnyConv.com__paints_logo.icns',
    debug=False,
    bootloader_ignore_signals=False,
    strip=False,
    upx=True,
    console=True,
    disable_windowed_traceback=False,
    argv_emulation=False,
    target_arch=None,
    codesign_identity=None,
    entitlements_file=None,
)

a.datas += Tree('./pretrained_weights', prefix='pretrained_weights')


coll = COLLECT(
    exe,
    a.binaries,
    a.datas,
    strip=False,
    upx=True,
    upx_exclude=[],
    name='LivePortrait',
)
这里按照 pyinstaller 官方文档对项目的入口文件,依赖文件,三方目录等进行声明。
接着运行打包命令:
pyinstaller webui.spec 程序返回:
98124 INFO: Rewriting the executable's macOS SDK version (13.1.0) to match the SDK version of the Python library (12.1.0) in order to avoid inconsistent behavior and potential UI issues in the frozen application.
98125 INFO: Re-signing the EXE
98243 INFO: Building EXE from EXE-00.toc completed successfully.
98244 INFO: checking Tree
98244 INFO: Building Tree because Tree-00.toc is non existent
98244 INFO: Building Tree Tree-00.toc
98265 INFO: checking COLLECT
98266 INFO: Building COLLECT because COLLECT-00.toc is non existent
98266 INFO: Building COLLECT COLLECT-00.toc
108930 INFO: Building COLLECT COLLECT-00.toc completed successfully.
代表打包成功,在项目的 dist 目录下会生成可执行程序:
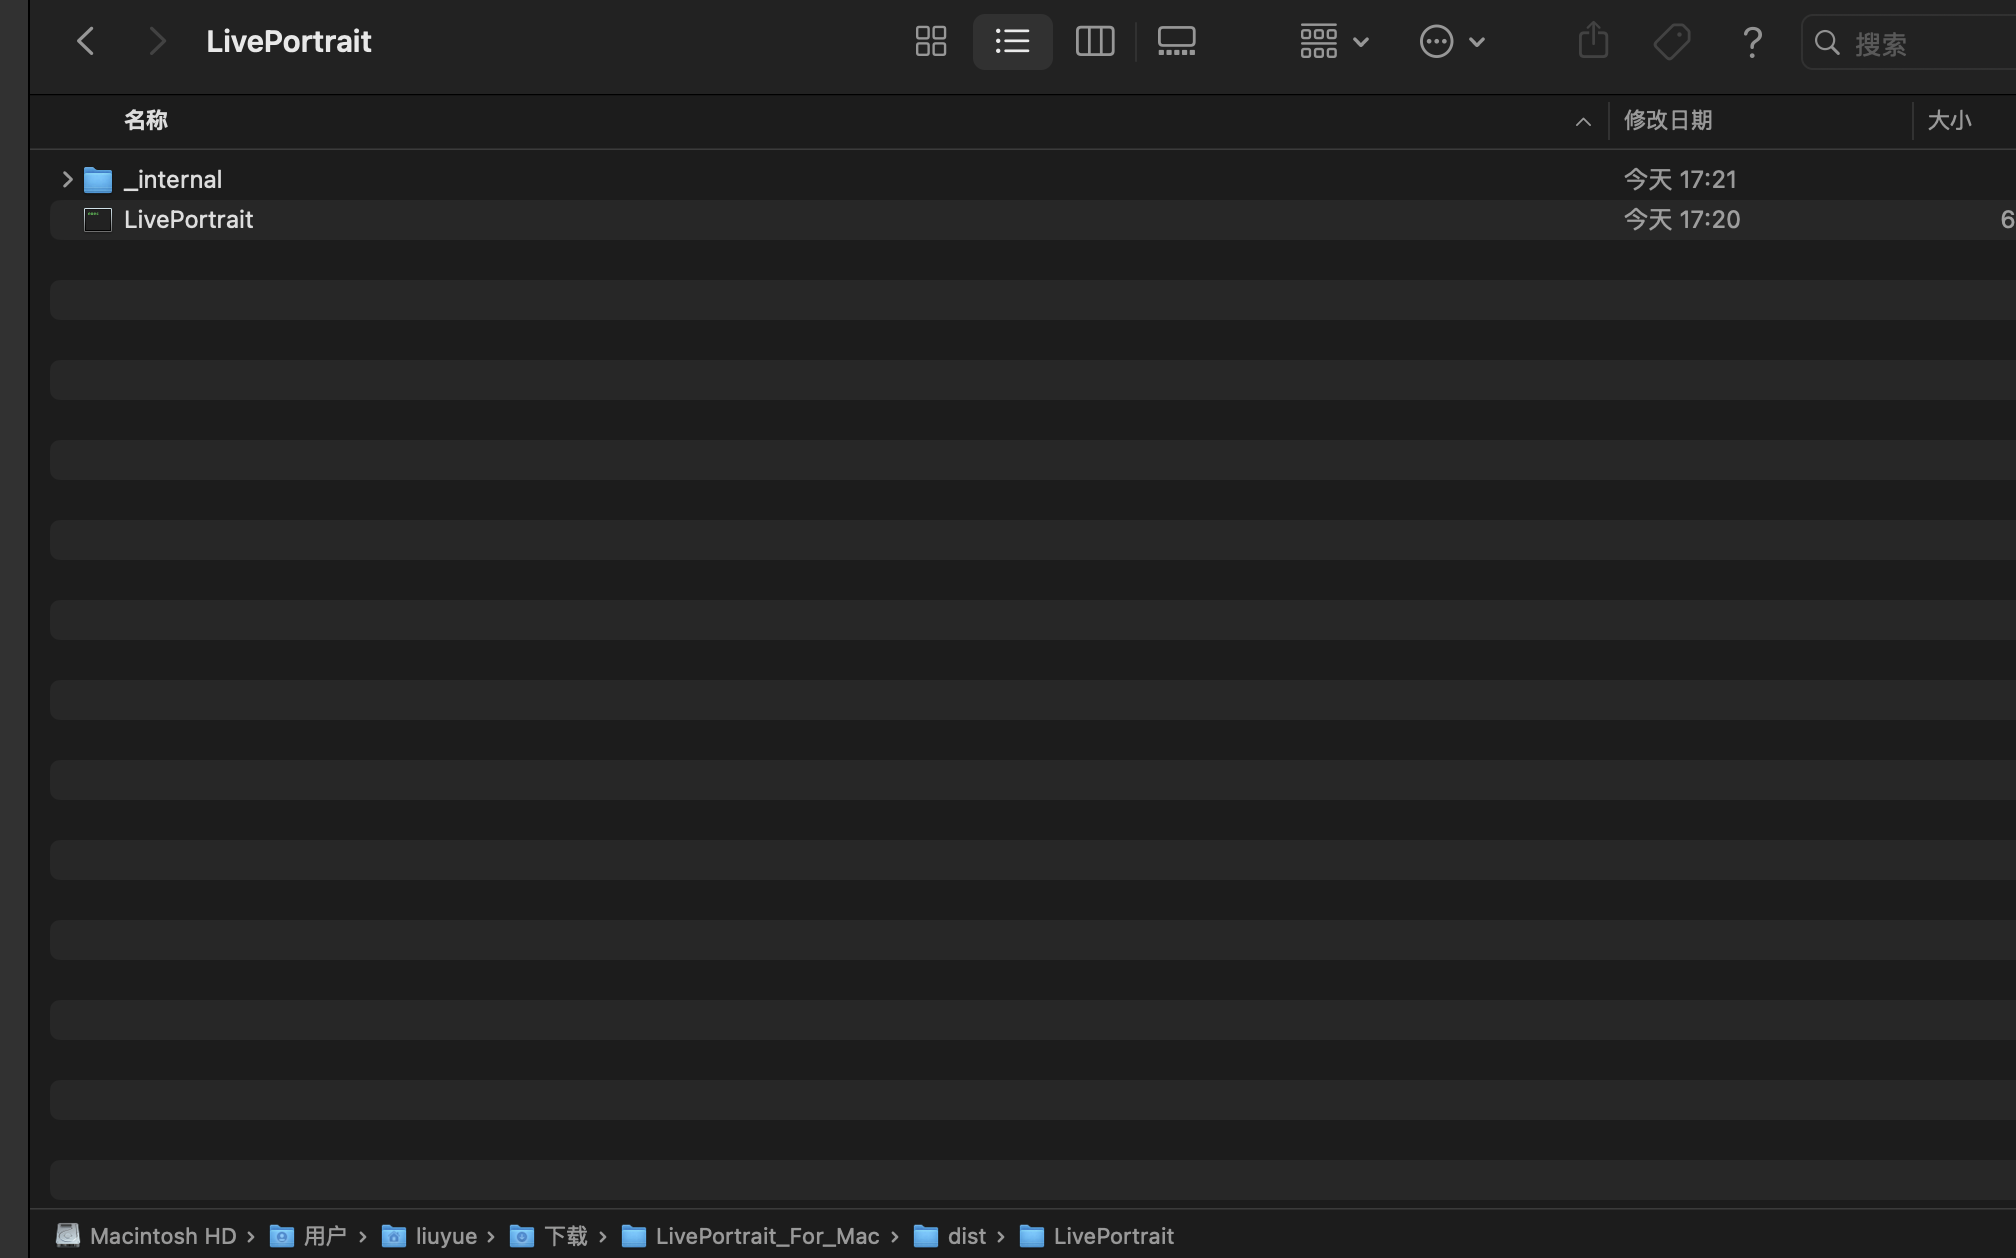
双击 LivePortrait 图标进行测试即可。
至此,程序就打包好了。
MacOs本地构建DMG安装包
随后,运行磁盘工具,新建一个磁盘文件,快捷键 cmd + N:
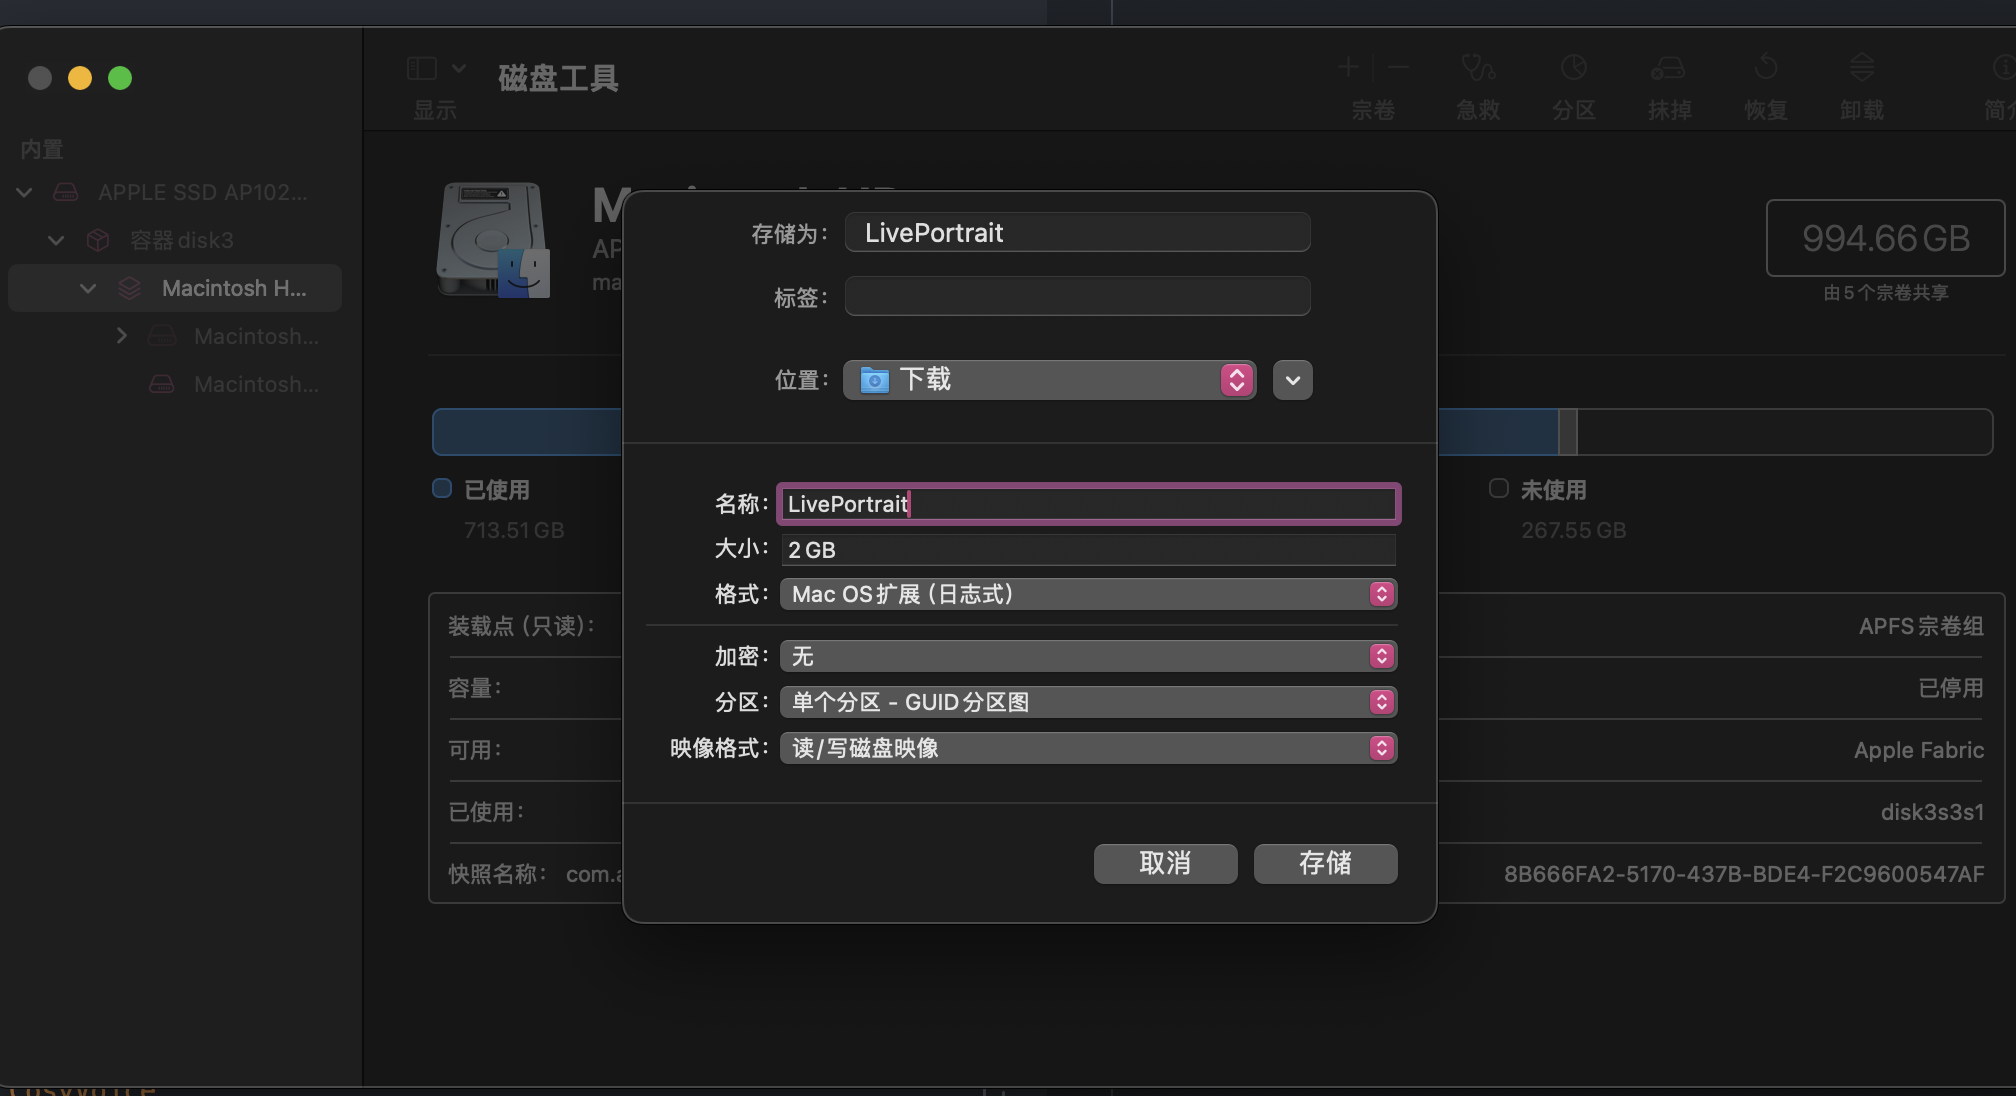
注意格式必须是 mac os 扩展(日志式),体积需要大于2G
接着把刚才打包好的项目文件拷贝到新建的磁盘中即可。
随后推出磁盘,点击 映像-》转换,对保存好的磁盘文件dmg进行压缩。
最后我们得到一个压缩好的DMG安装文件:
➜  mac ll
total 5328720
-rw-r--r--@ 1 liuyue  staff   2.5G  8 20 19:49 LivePortrait(已转换).dmg
在别的Mac电脑中双击安装包打开运行即可。
至此我们就走完了整个MacOS的AI项目程序制作流程,最后,奉上打包好的程序文件,与众乡亲同飨:
新版LivePortrait整合包(苹果MacOsAppleSilicon)图片引擎 https://pan.quark.cn/s/53c24cd845b9