上穷碧落下凡尘:Win10系统下基于Docker配置Elasticsearch7配合Python3进行全文检索交互

基于文档式的全文检索引擎大家都不陌生,之前一篇文章:使用Redisearch实现的全文检索功能服务,曾经使用Rediseach来小试牛刀了一把,文中戏谑的称Rediseach已经替代了Elasticsearch,其实不然,Elasticsearch作为老牌的全文检索引擎还并没有退出历史舞台,依旧占据主流市场,桃花依旧笑春风,阿里也在其ecs服务中推出了云端Elasticsearch引擎,所以本次我们在Win10系统中依托Docker来感受一下Elasticsearch的魅力。
首先安装Docker,具体流程请参照:win10系统下把玩折腾DockerToolBox以及更换国内镜像源(各种神坑),这里不再赘述。
拉取Elasticsearch镜像,这里我们使用7.0以上的版本,该版本从性能和效率上都得到了优化。
docker pull elasticsearch:7.2.0随后运行Elasticsearch镜像
docker run --name es -p 9200:9200 -p 9300:9300 -e "discovery.type=single-node" -d elasticsearch:7.2.0容器别名我们就用缩写es来替代,通过 9200 端口并使用 Elasticsearch 的原生 传输 协议和集群交互。集群中的节点通过端口 9300 彼此通信。如果这个端口没有打开,节点将无法形成一个集群,运行模式先走单节点模式。
启动容器成功后,可以访问一下浏览器: http://localhost:9200

OK,没有任何问题,Elasticsearch 采用 YAML 文件对系统进行配置,原理很简单,就像Django的settings或者Flask的Config,只要通知Elasticsearch服务在运行过程中一些你想要的功能,而Elasticsearch会找到elasticsearch.yml,之后按你指定的参数运行服务。
此时,我们需要将容器内部Elasticsearch的配置文件拷贝出来,这样以后启动容器就可以按照我们自己指定的配置来修改了。
docker cp 容器id:/usr/share/elasticsearch/config/elasticsearch.yml ./elasticsearch.yml老规矩,前面的是容器内地址,后面的是宿主机地址,这里我就拷贝到当前目录下,当然了,你也可以指定绝对路径。
打开elasticsearch.yml,可以自己加一些配置,比如允许跨域访问,这样你这台Elasticsearch就可以被别的服务器访问了,这是微服务全文检索系统架构的第一步。
cluster.name: "docker-cluster"
network.host: 0.0.0.0
http.cors.enabled: true
http.cors.allow-origin: "*"
然后停止正在运行的Elasticsearch容器,并且删除它。
docker stop 容器id
docker rm $(docker ps -a -q)
再次启动Elasticsearch容器,这一次不同的是,我们需要通过-v挂载命令把我们刚刚修改好的elasticsearch.yml挂载到容器内部去,这样容器就根据我们自己修改的配置文件来运行Elasticsearch服务。
docker run --name es -v /es/elasticsearch.yml:/usr/share/elasticsearch/config/elasticsearch.yml -p 9200:9200 -p 9300:9300 -e "discovery.type=single-node" -d elasticsearch:7.2.0这里需要注意一点,就是在Win10宿主机里需要单独设置一下共享文件夹,这里我设置的共享文件夹叫做es,如果是Centos或者Mac os就直接写真实物理路径即可。
这里再简单介绍一下Win10如何设置共享文件夹用来配合Docker的挂载,打开virtualBox设置,新建一个共享文件夹es
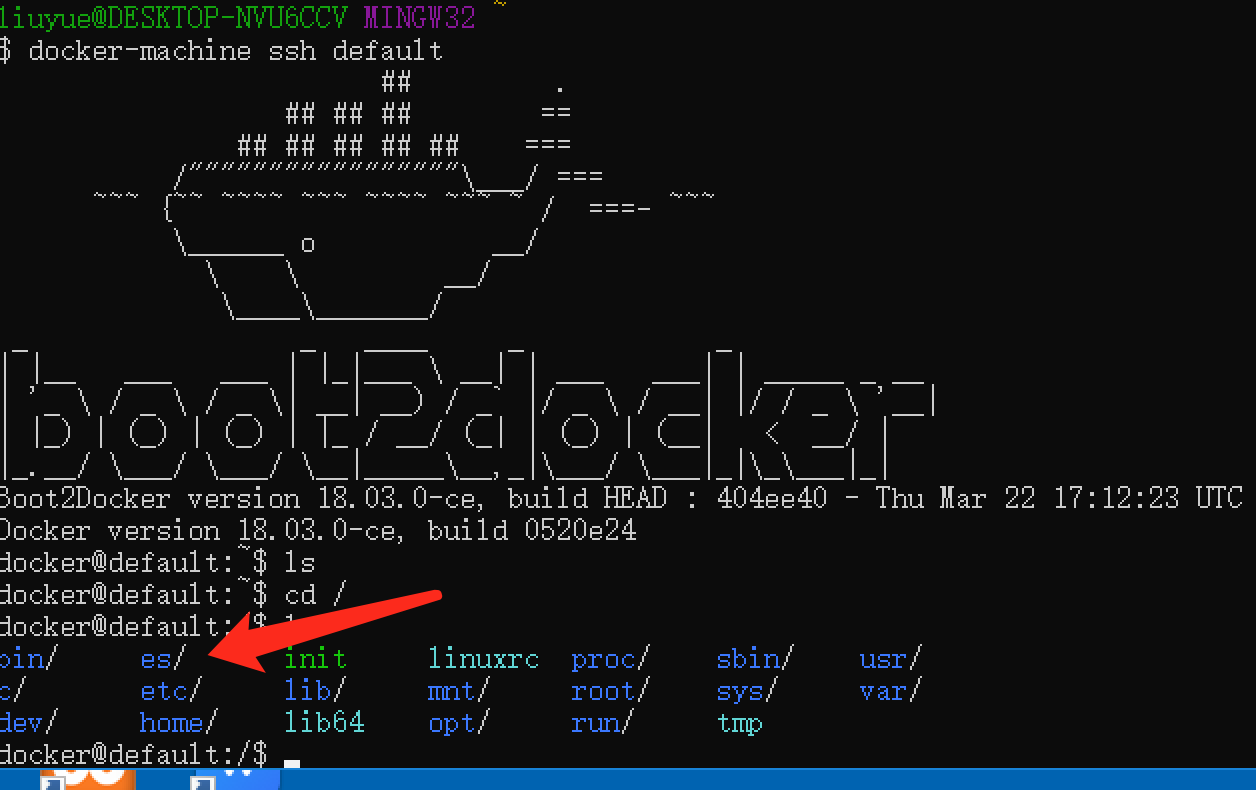
 随后,重启Docker,输入命令进入默认容器:docker-machine ssh default
在容器根目录能够看到刚刚设置的共享文件夹,就说明设置成功了。
另外还有一个需要注意的点,就是Elasticsearch存储数据也可以通过-v命令挂载出来,如果不对数据进行挂载,当容器被停止或者删除,数据也会不复存在,所以挂载后存储在宿主机会比较好一点,命令是:
docker run --name es -v /es/elasticsearch.yml:/usr/share/elasticsearch/config/elasticsearch.yml -v /es/data:/usr/share/elasticsearch/data -p 9200:9200 -p 9300:9300 -e "discovery.type=single-node" -d elasticsearch:7.2.0再次启动容器成功之后,我们就可以利用Python3来和全文检索引擎Elasticsearch进行交互了,安装依赖的库。
pip3 install elasticsearch新建es_test.py测试脚本
建立Elasticsearch的检索实例
from elasticsearch import Elasticsearch

es = Elasticsearch(hosts=[{"host":'Docker容器所在的ip', "port": 9200}])
这里的host指容器ip,因为可以扩展集群,所以是一个list,需要注意一点,如果是Win10就是系统分配的那个ip,Centos或者Mac os直接写127.0.0.1即可。
建立索引(Index),这里我们创建一个名为 article 的索引
result = es.indices.create(index='article', ignore=400)
print(result)

{'acknowledged': True, 'shards_acknowledged': True, 'index': 'article'}
其中的 acknowledged 字段表示创建操作执行成功。
删除索引也是类似的,代码如下:
result = es.indices.delete(index='article', ignore=[400, 404])
print(result)

{'acknowledged': True}
插入数据,Elasticsearch 就像 MongoDB 一样,在插入数据的时候可以直接插入结构化字典数据,插入数据可以调用 index() 方法,这里索引和数据是强关联的,所以插入时需要指定之前建立好的索引。
data = {'title': '我在北京学习人工智能', 'url': 'http://123.com','content':"在北京学习"}
result = es.index(index='article',body=data)
print(result)

{'_index': 'article', '_type': '_doc', '_id': 'GyJgb3MBuQaE6wYOApTh', '_version': 1, 'result': 'created', '_shards': {'total': 2, 'successful': 1, 'failed': 0}, '_seq_no': 5, '_primary_term': 1}
可以看到index()方法会自动生成一个唯一id,当然我们也可以使用create()方法创建数据,不同的是create()需要手动指定一个id。
修改数据也非常简单,我们同样需要指定数据的 id 和内容,调用 index() 方法即可,代码如下:
data = {'content':"在北京学习python"}

#修改
result = es.index(index='article',body=data, id='GyJgb3MBuQaE6wYOApTh')

{'_index': 'article', '_type': '_doc', '_id': 'GyJgb3MBuQaE6wYOApTh', '_version': 2, 'result': 'updated', '_shards': {'total': 2, 'successful': 1, 'failed': 0}, '_seq_no': 6, '_primary_term': 1}
删除数据,可以调用 delete() 方法,指定需要删除的数据 id 即可
#删除
result = es.delete(index='article',id='GyJgb3MBuQaE6wYOApTh')
print(result)

{'_index': 'article', '_type': '_doc', '_id': 'GyJgb3MBuQaE6wYOApTh', '_version': 3, 'result': 'deleted', '_shards': {'total': 2, 'successful': 1, 'failed': 0}, '_seq_no': 7, '_primary_term': 1}
查询数据,这里可以简单的查询全量数据:
#查询
result = es.search(index='article')
print(result)

{'took': 1079, 'timed_out': False, '_shards': {'total': 1, 'successful': 1, 'skipped': 0, 'failed': 0}, 'hits': {'total': {'value': 5, 'relation': 'eq'}, 'max_score': 1.0, 'hits': [{'_index': 'article', '_type': 'blog', '_id': '1', '_score': 1.0, '_source': {'title': '我在北京学习人工智能', 'url': 'http://123.com', 'content': '在北京学习'}}, {'_index': 'article', '_type': 'blog', '_id': 'FyIdb3MBuQaE6wYO8JQR', '_score': 1.0, '_source': {'title': '你好', 'content': '你好123'}}, {'_index': 'article', '_type': 'blog', '_id': 'GCIeb3MBuQaE6wYOnpSv', '_score': 1.0, '_source': {'title': '你好', 'url': 'http://123.com', 'content': '你好123'}}, {'_index': 'article', '_type': 'blog', '_id': 'GSJfb3MBuQaE6wYOu5RD', '_score': 1.0, '_source': {'title': '你好', 'url': 'http://123.com', 'content': '你好123'}}, {'_index': 'article', '_type': 'blog', '_id': 'GiJfb3MBuQaE6wYO5pR4', '_score': 1.0, '_source': {'title': '你好', 'url': 'http://123.com', 'content': '你好123'}}]}}
还可以进行全文检索,这才是体现 Elasticsearch 搜索引擎特性的地方。
mapping = {
    'query': {
        'match': {
            'content': '学习 北京'
        }
    }
}

result = es.search(index='article',body=mapping)
print(result)

{'took': 4, 'timed_out': False, '_shards': {'total': 1, 'successful': 1, 'skipped': 0, 'failed': 0}, 'hits': {'total': {'value': 1, 'relation': 'eq'}, 'max_score': 4.075481, 'hits': [{'_index': 'article', '_type': 'blog', '_id': '1', '_score': 4.075481, '_source': {'title': '我在北京学习人工智能', 'url': 'http://123.com', 'content': '在北京学习'}}]}}
可以看出,检索时会对对应的字段全文检索,结果还会按照检索关键词的相关性进行排序,这就是一个基本的搜索引擎雏形。
除了这些最基本的操作,Elasticsearch还支持很多复杂的查询,可以参照最新的7.2版本文档:https://www.elastic.co/guide/en/elasticsearch/reference/7.2/query-dsl.html
结语:体验了之后,有人说,Elasticsearch这玩意还真不错,能不能把Mysql或者Mongo全都扔了,就拿它当数据库不就完事了吗?答案当然是不可能的,因为Elasticsearch没有事务,而且是查询是近实时,写入速度很慢,只是读取数据快,成本也比数据库高,几乎就在靠吃内存提高性能,它目前只是作为搜索引擎的存在,如果你的业务涉及全文检索,那么它就是你的首选方案之一。