Python3.7爬虫:实时api(百度ai)检测验证码模拟登录(Selenium)页面

今天有同学提出了一个需求,老板让自动登录这个页面:https://www.dianxiaomi.com/index.htm,毫无疑问登录页面基本都会有在线验证码,要破解这个验证码当然不是啥难事,诚然可以自己去训练模型,然而大量的训练集测试数据还得自己去打码,说白了,不值当,有现成的接口可以用,何乐而不为,于是我们向万恶的百度伸出了魔爪。
首先申请百度api开发平台:https://cloud.baidu.com/
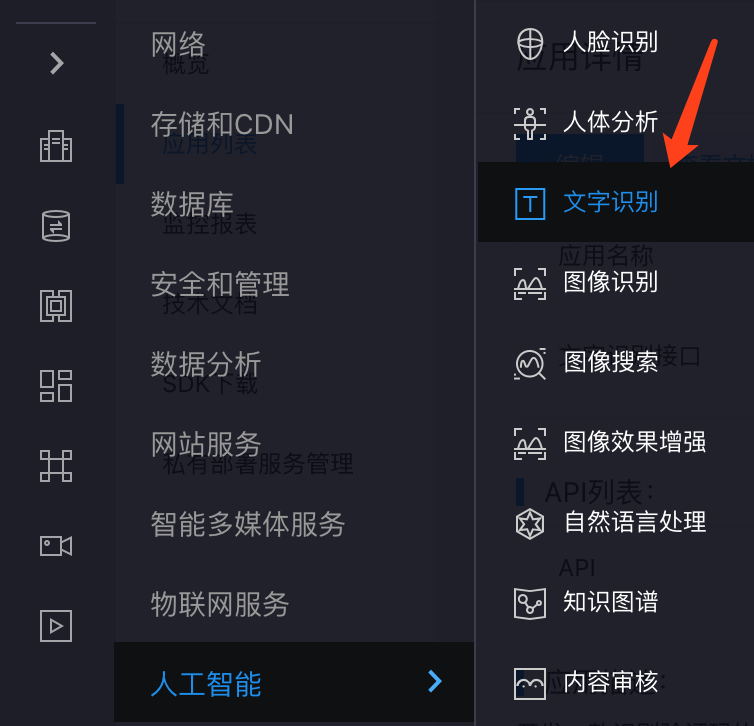
随后在人工智能-》文字识别 模块里建立一个应用

建立成功后,会分配给你一个key和secret

只不过这个接口免费版的每秒最多只能请求两次,一天有500次的请求机会
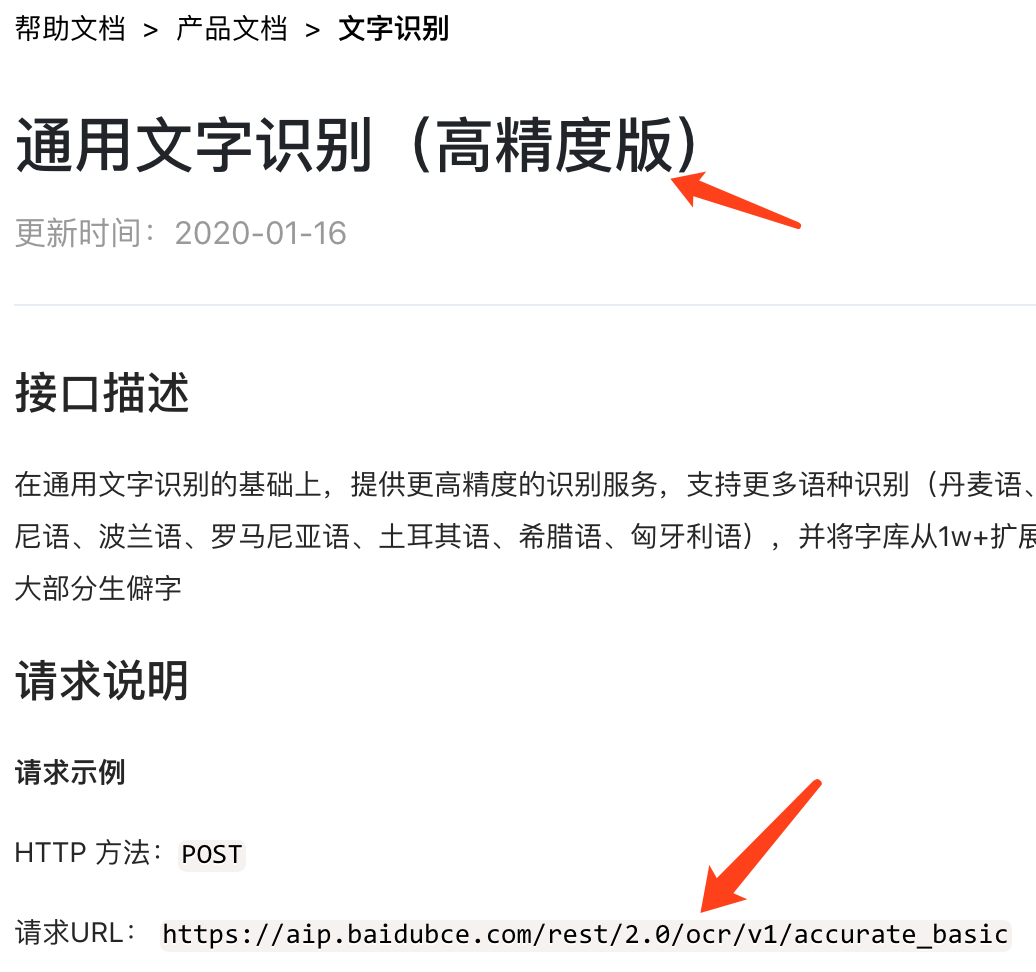
这里推荐使用高精度的接口,普通的识别率太差了

第一步,获取access_token
res = requests.get("https://aip.baidubce.com/oauth/2.0/token?grant_type=client_credentials&client_id=你的key&client_secret=你的秘钥")

res = json.loads(str(res.text))
token = res['access_token']
temp_url = 'https://aip.baidubce.com/rest/2.0/ocr/v1/accurate_basic?access_token=' + token
temp_headers = {'Content-Type': 'application/x-www-form-urlencoded'}
temp_file = open('./test.png', 'rb')
temp_image = temp_file.read()
temp_file.close()
temp_data = {'image': base64.b64encode(temp_image)}
temp_data = urllib.parse.urlencode(temp_data)
temp_res = requests.post(url=temp_url, data=temp_data, headers=temp_headers)

res = json.loads(str(temp_res.text))
code = res['words_result'][0]['words']

现在验证码识别已经搞定,问题的关键是,每次打开页面的时候,怎么将图片传给百度接口
其实很简单,我们可以考虑使用selenium自动化工具来截图,selenium是可以根据选择器做局部截图的
nodes = driver.find_element_by_id('loginImgVcode')
nodes.screenshot('test.png')
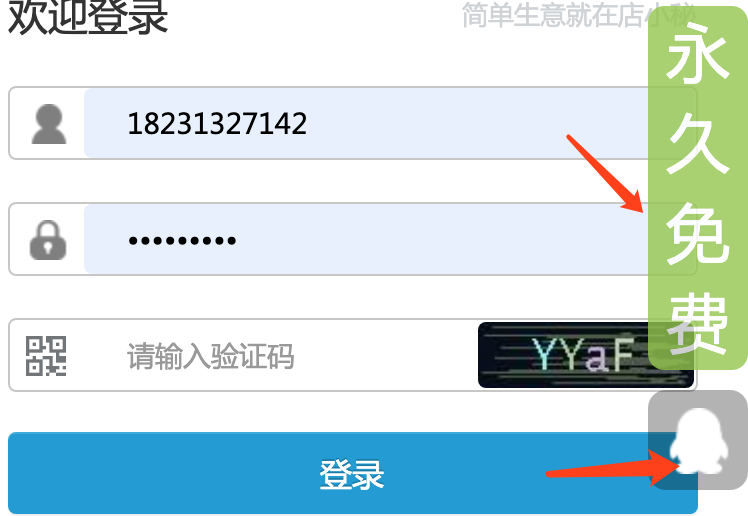
虽然可以截图,但是其实发现有东西干扰了验证码图片
原来是旁边讨厌的广告挡住了验证码,这样的干扰会让识别产生误差

其实这些html标签是可以移除的,使用selenium运行js代码来删除这些干扰元素
#删除元素
js = "var elem = document.getElementsByClassName('dnf');elem[0].parentNode.removeChild(elem[0]);"
driver.execute_script(js)

js = "var elem = document.getElementsByClassName('qqshow');elem[0].parentNode.removeChild(elem[0]);"
driver.execute_script(js)

js = "var elem = document.getElementsByClassName('QR');elem[0].parentNode.removeChild(elem[0]);"
driver.execute_script(js)

这里还有个技巧,可以提高百度api的识别准确度,就是利用opencv对验证码图片进行降噪去色的操作。
首先安装opencv
pip3 install opencv-python然后对原图进行去色处理
import cv2

img = cv2.imread('./code.png', cv2.IMREAD_GRAYSCALE)
print("cv2.imread(imgfile, cv2.IMREAD_GRAYSCALE)结果如下:")
print('大小:{}'.format(img.shape))
print("类型:%s"%type(img))
print(img)

cv2.imwrite('code1.png', img)
去色降噪后的效果是这样的,可以提高识别成功率

当然了,灰度处理可能有时候还不能达到标准,也可以进一步进行二值化处理:
import cv2
import matplotlib.pyplot as plt
img = cv2.imread("/Users/liuyue/Downloads/code.png")
img2 = cv2.cvtColor(img, cv2.COLOR_RGB2GRAY)
img2 = cv2.inRange(img2, lowerb=160, upperb=255)
plt.subplot(121), plt.imshow(img)  # 原始图片
plt.subplot(122), plt.imshow(img2)  # 降噪图片
plt.show()
selenium驱动下载地址:http://npm.taobao.org/mirrors/chromedriver/
剩下的就很简单了,直接利用selenium输入账号密码以及验证码就可以自动登录,非常轻松,完整代码如下:
import requests
import json
import base64
import urllib
from selenium import webdriver
import time


#selenium 截图
driver = webdriver.Chrome()
driver.get('https://www.dianxiaomi.com/index.htm')
time.sleep(1)

#删除元素
js = "var elem = document.getElementsByClassName('dnf');elem[0].parentNode.removeChild(elem[0]);"
driver.execute_script(js)

js = "var elem = document.getElementsByClassName('qqshow');elem[0].parentNode.removeChild(elem[0]);"
driver.execute_script(js)

js = "var elem = document.getElementsByClassName('QR');elem[0].parentNode.removeChild(elem[0]);"
driver.execute_script(js)


nodes = driver.find_element_by_id('loginImgVcode')
nodes.screenshot('test.png')

#用户名 exampleInputName exampleInputPassword

driver.find_element_by_id('exampleInputName').send_keys('18231327142')

driver.find_element_by_id('exampleInputPassword').send_keys('密码')


#请求百度api接口

res = requests.get("https://aip.baidubce.com/oauth/2.0/token?grant_type=client_credentials&client_id=你的key&client_secret=你的秘钥")

res = json.loads(str(res.text))
token = res['access_token']

temp_url = 'https://aip.baidubce.com/rest/2.0/ocr/v1/accurate_basic?access_token=' + token
temp_headers = {'Content-Type': 'application/x-www-form-urlencoded'}
temp_file = open('./test.png', 'rb')
temp_image = temp_file.read()
temp_file.close()
temp_data = {'image': base64.b64encode(temp_image)}
temp_data = urllib.parse.urlencode(temp_data)
temp_res = requests.post(url=temp_url, data=temp_data, headers=temp_headers)

res = json.loads(str(temp_res.text))
print(res)
code = res['words_result'][0]['words']


driver.find_element_by_id('loginVerifyCode').send_keys(code.strip().replace(' ',''))

#登录按钮
driver.find_element_by_id('loginBtn').click()

time.sleep(10)

driver.close()